- Home
- Symmetry Blog
- Wireless Configuration with the Digi XBee
From Digi: "Wireless Configuration with the Digi XBee Mobile App – XCTU for Mobile"

About Symmetry Electronics
Established in 1998, Symmetry Electronics, a Division of Braemac, is a global distributor of electronic components and systems. Combining premier components and comprehensive value-added services with an expert in-house engineering team, Symmetry supports engineers in the design, development, and deployment of a broad range of connected technologies.
Exponential Technology Group Member
Acquired by Berkshire Hathaway company TTI, Inc. in 2017, Symmetry Electronics is a proud Exponential Technology Group (XTG) member. A collection of specialty semiconductor distributors and engineering design firms, XTG stands alongside industry leaders TTI Inc., Mouser Electronics, and Sager Electronics. Together, we provide a united global supply chain solution with the shared mission of simplifying engineering, offering affordable technologies, and assisting engineers in accelerating time to market. For more information about XTG, visit www.xponentialgroup.com.
Digi XBee® Mobile is an iOS and Android compatible app for connecting and configuring Digi XBee3 devices using their new onboard Bluetooth. If you are familiar with Digi XCTU, you will immediately have a comfort level with the mobile version, which provides the same functionality.
The XBee Mobile App helps commission, provision, activate, investigate and update your Digi XBee3 radio modules wirelessly, with no physical access required. Once Bluetooth is activated you can leave behind your heavy laptop, development board and USB cables. Going forward, your smartphone is all you’ll need to manage your Digi XBee3 radio module
Using the XBee Mobile App
In this hands-on guide, we’ll show you how to use the mobile app version of Digi XCTU:
- Look for and connect to nearby XBee3 BLE devices.
- Get basic information about the device and the firmware version it is running.
- List all the configuration categories and settings of the firmware running in the XBee3 device.
- Read and change the value of any firmware setting.
- Perform a remote reset of the device.
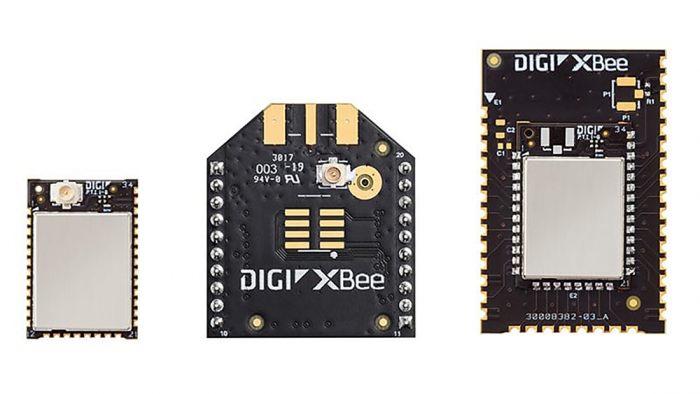 Digi XBee3 in micro, through-hole and SMT modules
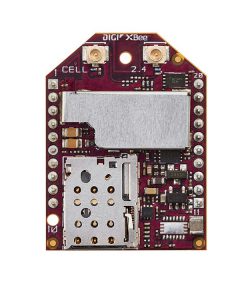 Digi XBee3 Cellular
The XBee Mobile App works with:
Configure the XBee3 Zigbee Radio
Let’s get our hands dirty with a Digi XBee3 Zigbee radio module so you can see for yourself how easy and convenient it is to configure an XBee3 from your smartphone or tablet with the XBee Mobile App.
Parts Needed
- Digi XBee3 Zigbee with antenna
- XBee Mobile App for Android or iOS
- XBIB development board or XBee Grove Development Board
- USB A to B cable
- XCTU configuration tool
- Laptop computer (Windows, Mac or Linux)
Note:
Activate Bluetooth
Before using the XBee Mobile App, you’ll want to activate Bluetooth on your Digi XBee3 and assign it a password using the XCTU application on a Windows, MacOS or Linux computer.
Set up XCTU
- Download XCTU onto your computer and install it.
- Mount an XBee3 radio onto the XBIB evaluation board and connect it to the computer.
- Launch XCTU and add a module, using the icon with the plus sign in the upper left, then selecting the appropriate port and baud rate.
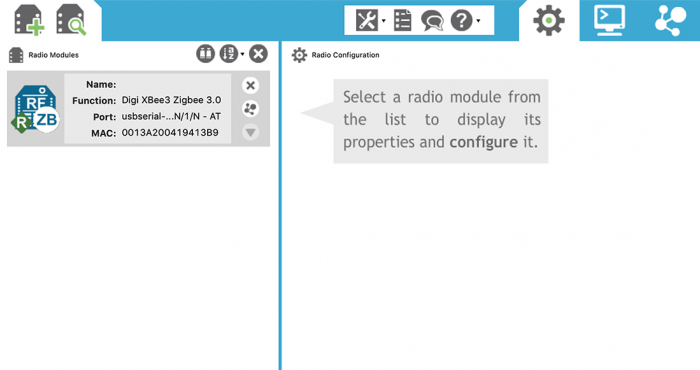
Digi XBee3 module added to XCTU
- Click on the radio module in the left column to select it. The module’s configuration will be displayed in the right column.
- Scroll down to the Bluetooth Options section to configure Bluetooth settings.
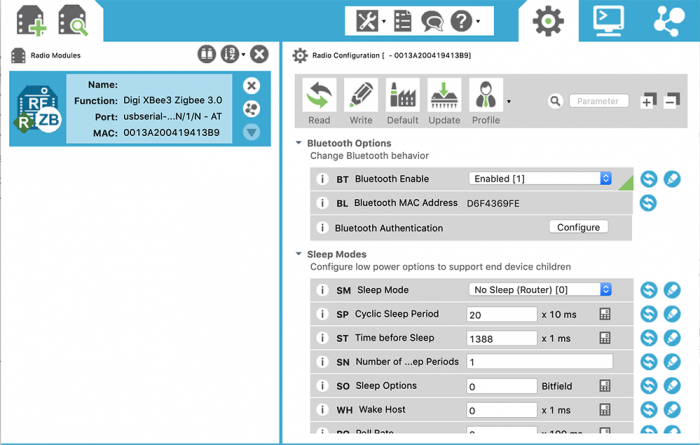 Digi XBee3 Bluetooth Options in XCTU
- Set BT Bluetooth Enable to “Enabled (1)” and click the pencil icon to save that change to the radio module.
- If a Bluetooth password has not been set, you will automatically be asked to configure it.
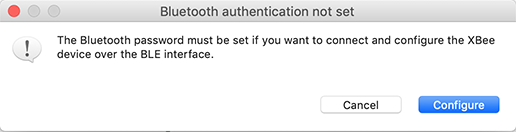 Bluetooth password dialog in XCTU
- The Configure Bluetooth Authentication screen is displayed. Enter a secure password for Basic configuration and click OK to complete the setup.
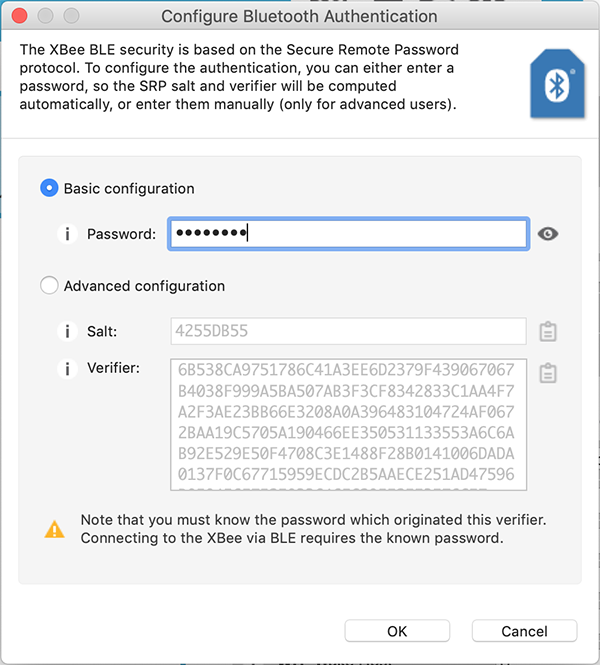 Configure Bluetooth authentication in XCTU
Your Digi XBee3 radio module now has Bluetooth activated and will allow secure connections from the XBee Mobile application. You can leave the XBIB evaluation board connected to the computer for power, or change to a portable USB battery power supply to go fully wireless.

The XBee Mobile application is a free download for both Android and iOS. Download it onto your tablet or smartphone and launch the app to continue. Be sure to review the XBee Mobile App documentation.
Once the app is installed with your XBee3 radio module powered on, you’re ready to connect.
Connecting to XBee3
When you start the XBee Mobile app, it will search for all nearby Bluetooth-enabled XBee3 radio modules.
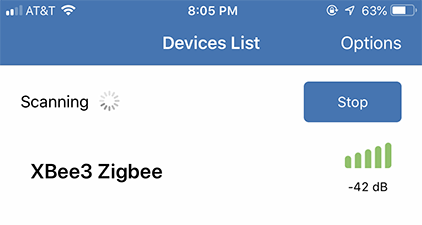 Searching for devices
Tap on your XBee3 to select it. Enter the password you configured during the XCTU setup.
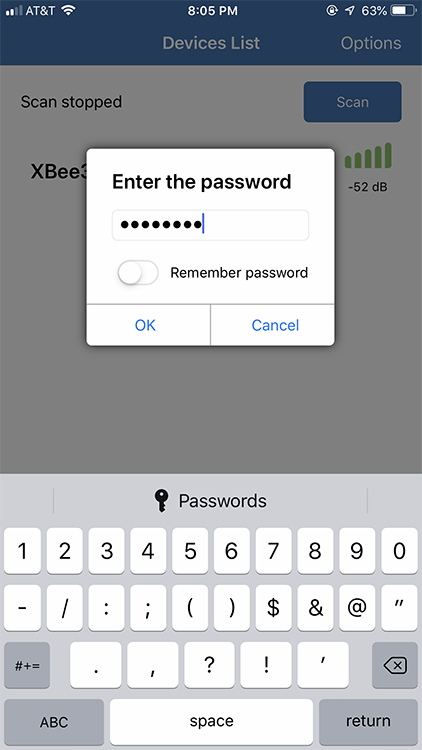 Password screen
When you have entered the correct password, the XBee3 device configuration categories will be displayed. Notice that the module is identified by only its MAC address; the Name field is blank by default.
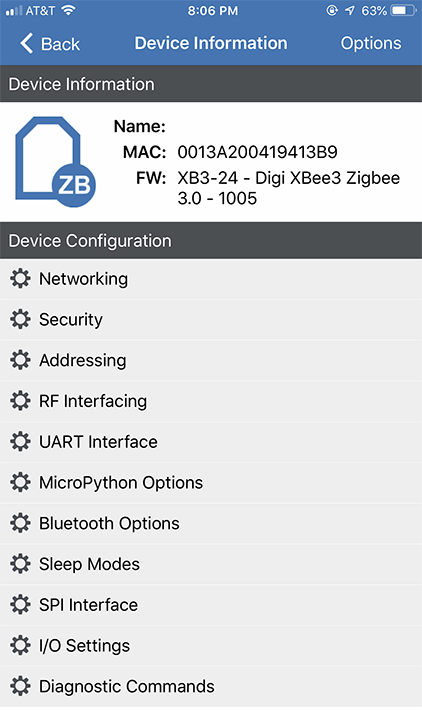 XBee device configuration
Using the XBee Mobile App
Entering a new setting is very easy. Let’s give the XBee3 a real name, so we can label it in a human-friendly fashion. For example, in a municipal street lighting application, we might give it a label like “Streetlight 476”. Tap the Addressing category to see the current setup. Scroll down to Node Identifier, which is blank by default. Tap on this field to enter new text, typing in “Streetlight 476”. Tap the Write button once you are done.
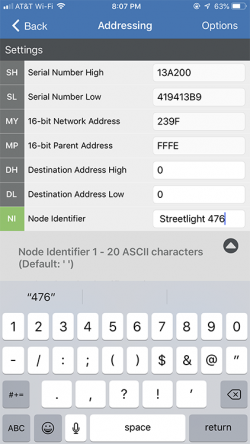 Addressing settings, modifying
Node Identifier
 Write the changed setting
 Node Identifier saved
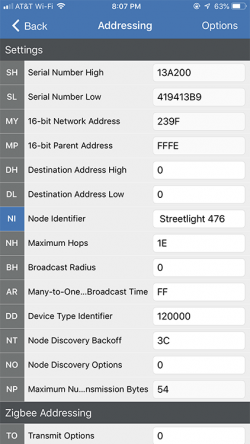
The information you entered in Node Identifier was saved to the XBee3. It can be displayed in addition to the radio module’s MAC address, making it easier to identify it wirelessly when many others are present. You will see this Node Identifier displayed inside the XBee Mobile application as “Name: Streetlight 476″.
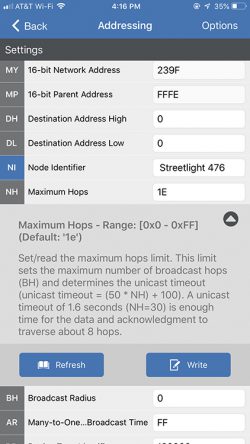
NH maximum hops help textTap Options at the top right of the screen to display various read/write commands for this category, as well as some basic control functions. For now, just tap Cancel and then tap < Back at the top left of the screen to return to the Device Informationpage. Tapping Options here shows just the basic control functions. Tap Disconnect to end your session.
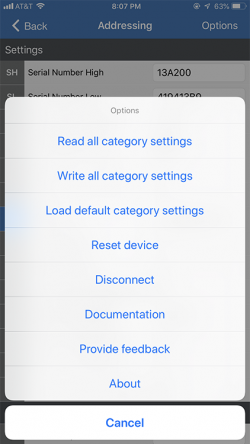 Options for current category
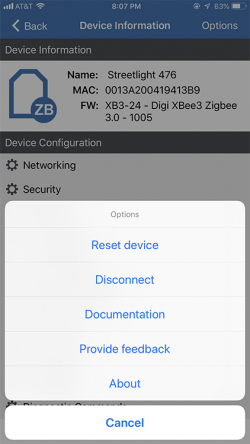 Options for whole device
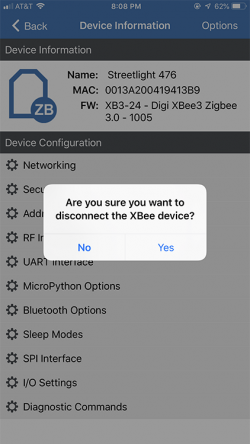 Confirm disconnection
Useful Settings
There are a lot of settings to choose from. In many applications the factory defaults will be optimal. It’s best to change only what you need to, though don’t be afraid to experiment within your test environment. It’s a great way to learn.
Here are some you might want to look at first, since they are more frequently customized:
- During initial configuration and commissioning of the radio module you may want to set the serial baud rate (UART category, BD Baud Rate), configure GPIO input and output pins (I/O Settings category), change the local API mode (UART category, AP API Enable), request Zigbee coordinator verification during join (Networking category, JV Coordinator Verification) and enable network encryption (Security category).
- Sleeping the radio module will save energy, battery life and therefore also save money (Sleep Modes category). MicroPython scripts allow intelligent decision making to occur onboard the XBee3 module, if you launch them automatically (MicroPython Options, PS MicroPython Autostart). See our series of MicroPython posts for more information.
- In the field you can activate one Zigbee radio module to be a coordinator (Networking category, CE Device Role), request serial join verification notices (Networking, JV Join Verification) and see various diagnostic information, including the internal temperature (Diagnostic Commands, TP Temperature). And there’s plenty more.
Looking to integrate Digi products with your design? Our Applications Engineers offer free design and technical help for your latest designs. Contact us today!
About Symmetry Electronics
Established in 1998, Symmetry Electronics, a Division of Braemac, is a global distributor of electronic components and systems. Combining premier components and comprehensive value-added services with an expert in-house engineering team, Symmetry supports engineers in the design, development, and deployment of a broad range of connected technologies.
Exponential Technology Group Member
Acquired by Berkshire Hathaway company TTI, Inc. in 2017, Symmetry Electronics is a proud Exponential Technology Group (XTG) member. A collection of specialty semiconductor distributors and engineering design firms, XTG stands alongside industry leaders TTI Inc., Mouser Electronics, and Sager Electronics. Together, we provide a united global supply chain solution with the shared mission of simplifying engineering, offering affordable technologies, and assisting engineers in accelerating time to market. For more information about XTG, visit www.xponentialgroup.com.