- Home
- Braemac Blog
- Micrium OS USB-Device VENDOR Class and Demo
From Silicon Labs: "Micrium OS USB-Device VENDOR Class and Demo"

About Symmetry Electronics
Established in 1998, Symmetry Electronics, a Division of Braemac, is a global distributor of electronic components and systems. Combining premier components and comprehensive value-added services with an expert in-house engineering team, Symmetry supports engineers in the design, development, and deployment of a broad range of connected technologies.
Exponential Technology Group Member
Acquired by Berkshire Hathaway company TTI, Inc. in 2017, Symmetry Electronics is a proud Exponential Technology Group (XTG) member. A collection of specialty semiconductor distributors and engineering design firms, XTG stands alongside industry leaders TTI Inc., Mouser Electronics, and Sager Electronics. Together, we provide a united global supply chain solution with the shared mission of simplifying engineering, offering affordable technologies, and assisting engineers in accelerating time to market. For more information about XTG, visit www.xponentialgroup.com.
The objective of this blog is to show you the steps necessary to use an existing Micrium OS USBD example and add a different class and demo using the EFM32GG11.
Baseline Project
Since the Gecko SDK currently ships with a ‘micriumos_usbdhidmouse’ project for the SLSTK3701A_EFM32GG11 board, we can make a copy of it and rename it ‘micriumos_usbdvendor’. The convenience of making a copy of the project is to modify it according to our needs without breaking the Gecko SDK default projects. Start by locating the ‘micriumos_usbdhidmouse’ folder in your Simplicity Studio installation. The project location is at ‘C:\SiliconLabs\SimplicityStudio\v4\developer\sdks\gecko_sdk_suite\v2.5\app\mcu_example\SLSTK3701A_EFM32GG11’
Once you found the folder, make a copy of it and rename it ‘micriumos_usbdvendor’. Please make sure to keep the new folder at the same path location of the original. Locate the ‘SLSTK3701A_micriumos_usbdhidmouse.slsproj’ file inside your New Folder ‘micriumos_usbdvendor\SimplicityStudio’ and rename it ‘SLSTK3701A_micriumos_usbdvendor.slsproj’
We will be adding our new workspace, so launch Simplicity Studio and connect the SLSTK3701A_EFM32GG11 board to the PC.
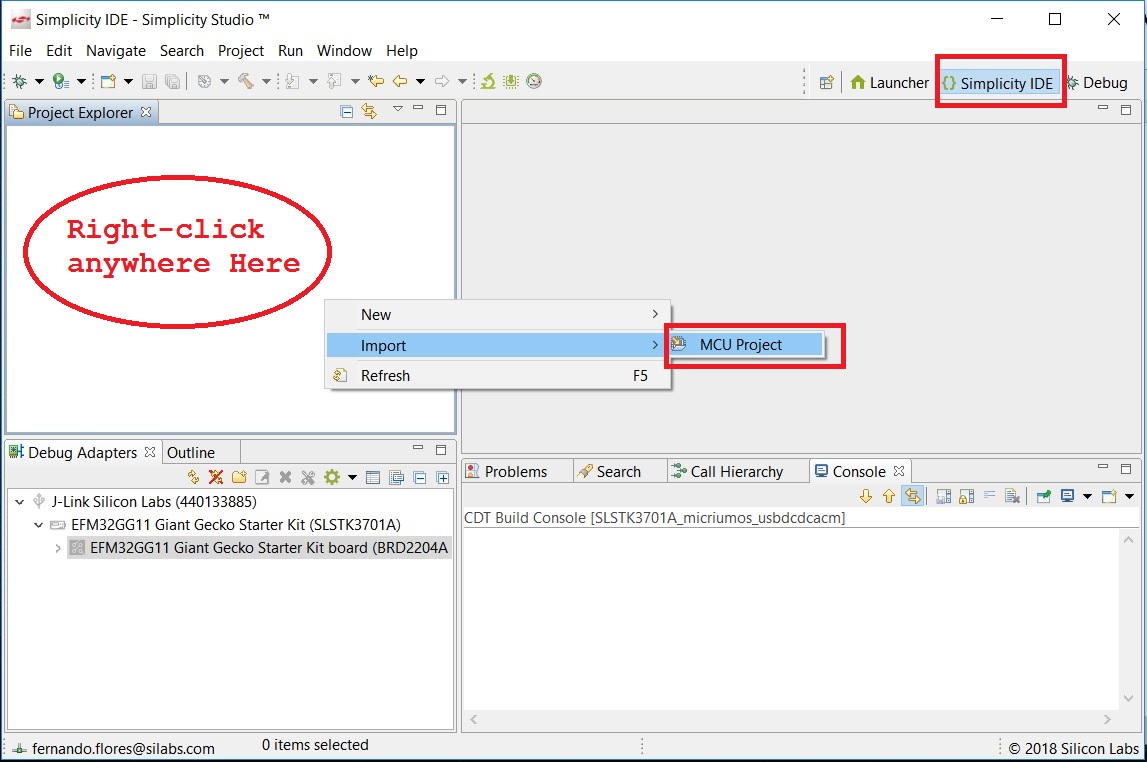
Add workspace by right-clicking anywhere inside the Project Explorer box and Select Import>MCU Project
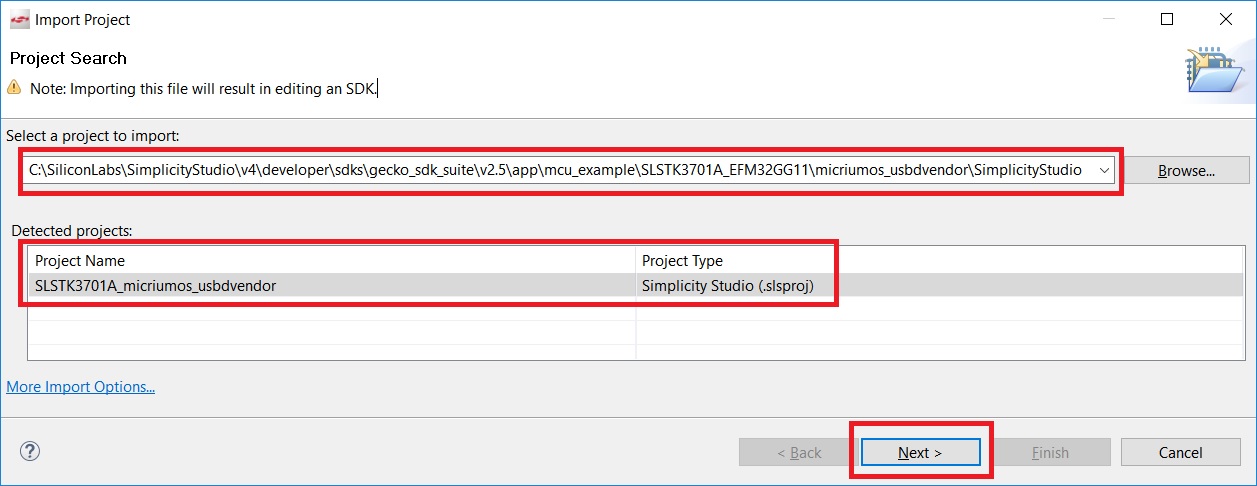
Use the Browse button to locate the ‘SLSTK3701A_micriumos_usbdvendor.slsproj’ and click Next>
File Location: `C:\SiliconLabs\SimplicityStudio\v4\developer\sdks\gecko_sdk_suite\v2.5\app\mcu_example\SLSTK3701A_EFM32GG11\micriumos_usbdvendor\SimplicityStudio`
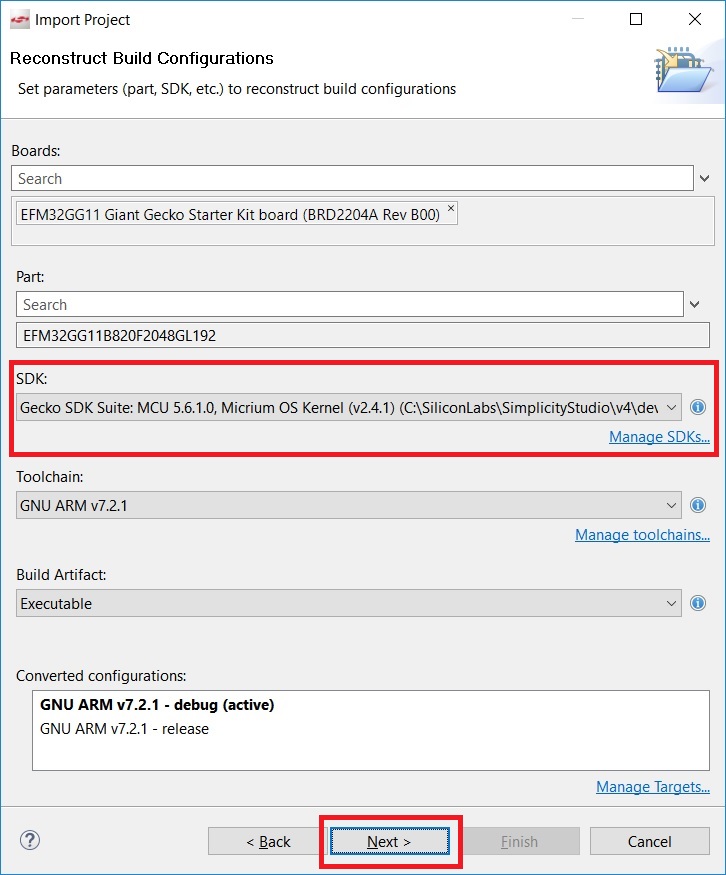
Since you already have your board connected, it should all be auto-detected. Leave everything by default making sure that there is an SDK selected, then click Next>
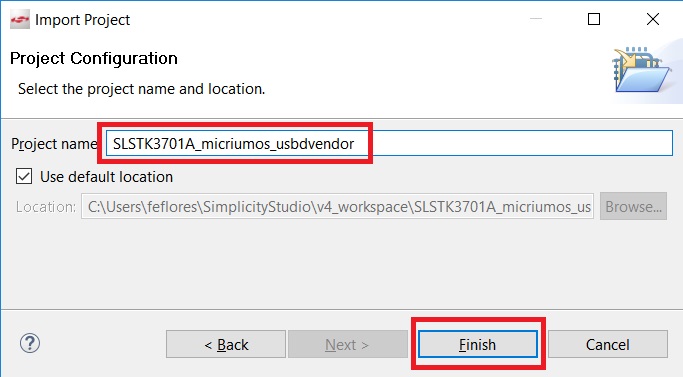
You can either change the name of the project or keep the default, then click Finish.
Configuration Files
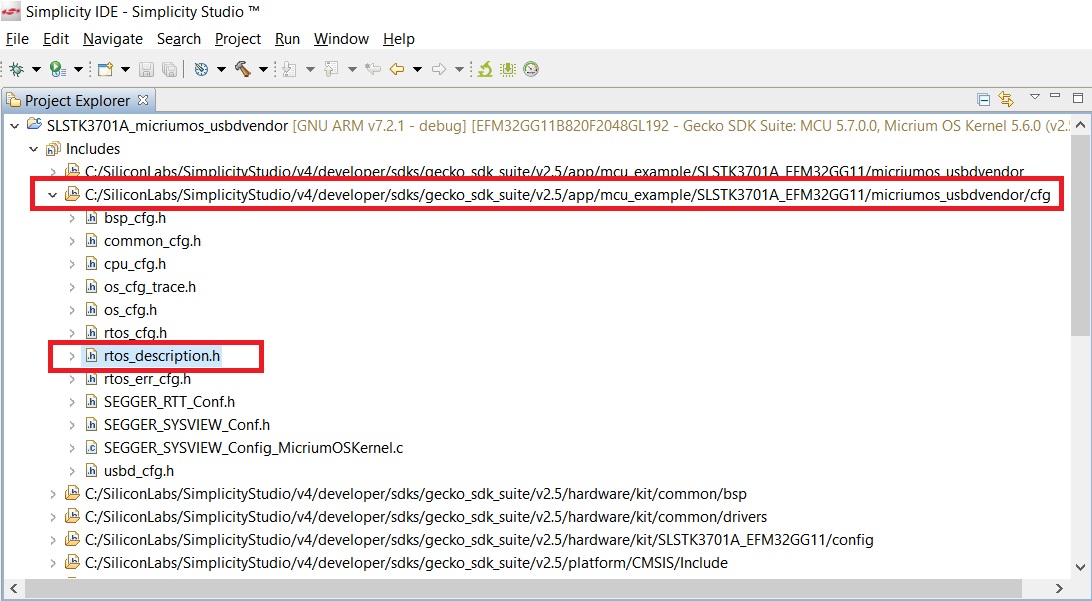
We will now need to modify the project configuration files to include Micrium OS USBD Vendor class as part of our build. Start by expanding the Includes section in the Project Explorer panel, then expand the configuration folder as shown in the image below. After that, double-click on the rtos_configuration.h to open it in the editor.
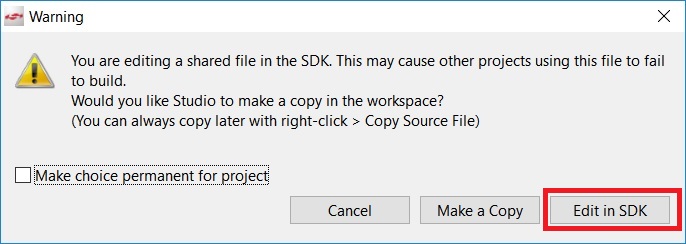
As soon as you try to edit the rtos_description.h, you will be presented a Warning indicating you are editing an SDK file. Click on Edit in SDK.
Add the following #define in rtos_description.h to indicate Micrium OS that you want to use VENDOR class.
#define RTOS_MODULE_USB_DEV_VENDOR_AVAILRemove the following #define in rtos_decription.h
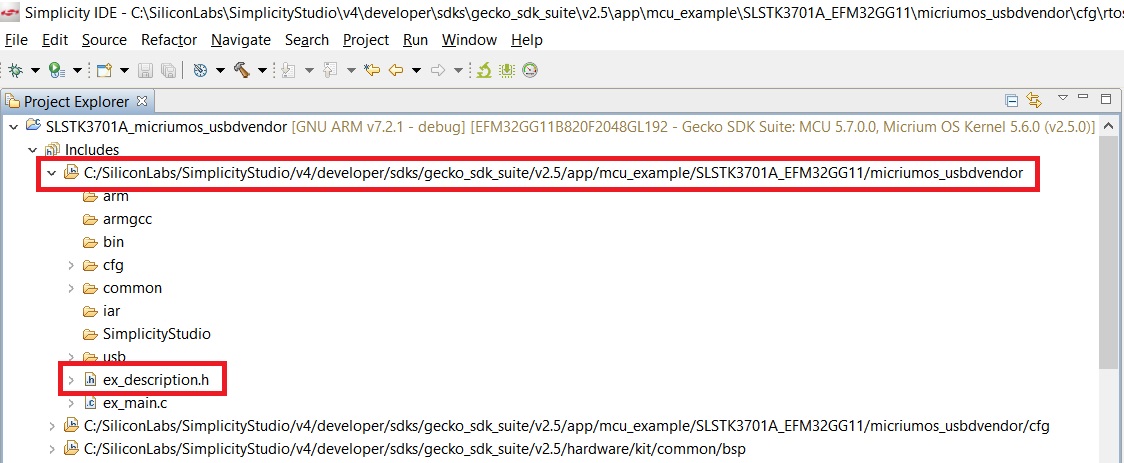
#define RTOS_MODULE_USB_DEV_HID_AVAILTell Micrium OS you want to use the USBD VENDOR demo by modifying ex_description.h. Expand the Includes section in the Project Explorer panel, then expand the project folder as shown in the image below. After that, double-click on the ex_description.h to open it in the editor.
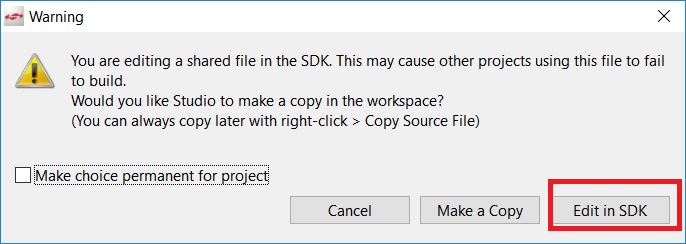
As soon as you try to edit the ex_description.h, you will be presented a Warning indicating you are editing an SDK file. Click on Edit in SDK.
Remove the following #define in ex_description.h
#define RTOS_MODULE_USB_DEV_HID_AVAILAdd the following #define in ex_description.h to indicate Micrium OS you want to use VENDOR class.
#define RTOS_MODULE_USB_DEV_VENDOR_AVAILAdding USBD Class and Demo
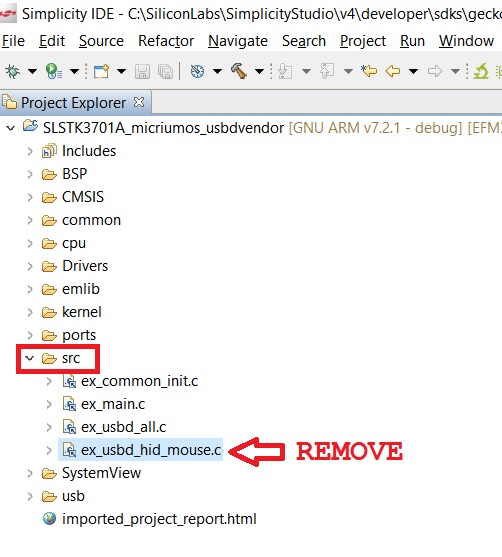
Expand the src section in the Project Explorer panel and remove the ‘ex_usbd_hid_mouse.c’ linked file.
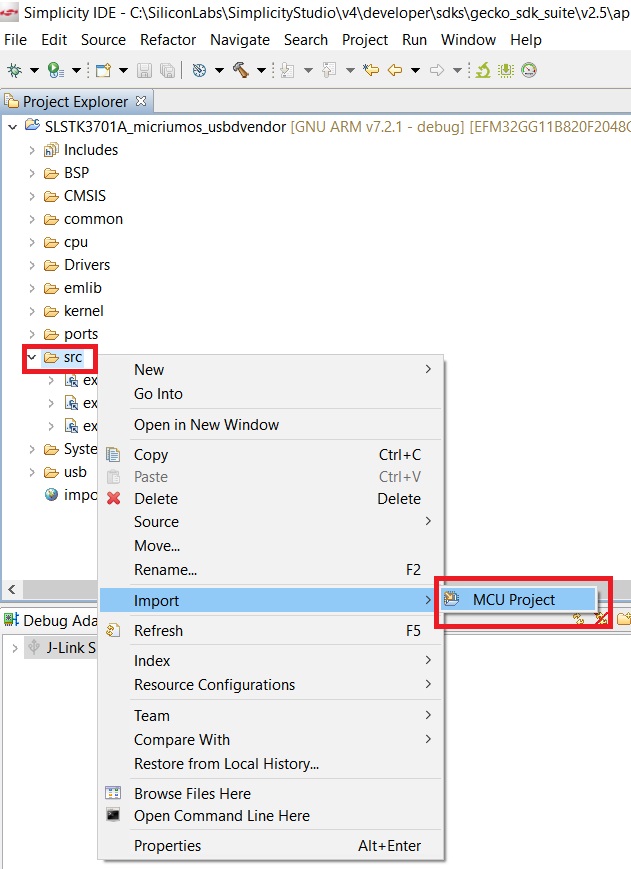
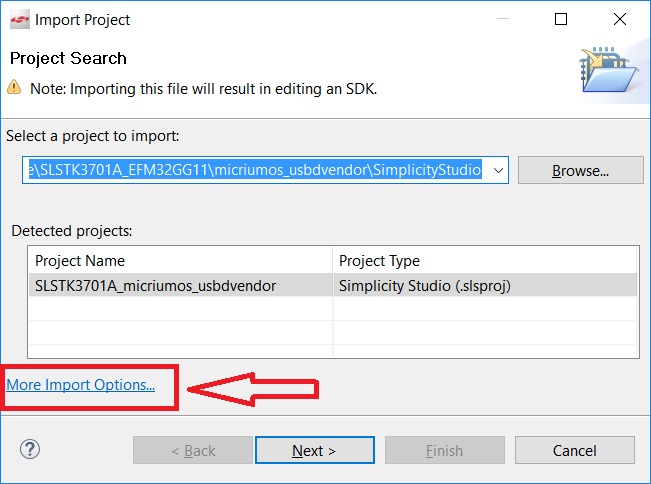
Select Import > MCU Project by right-clicking on src section as shown on image below
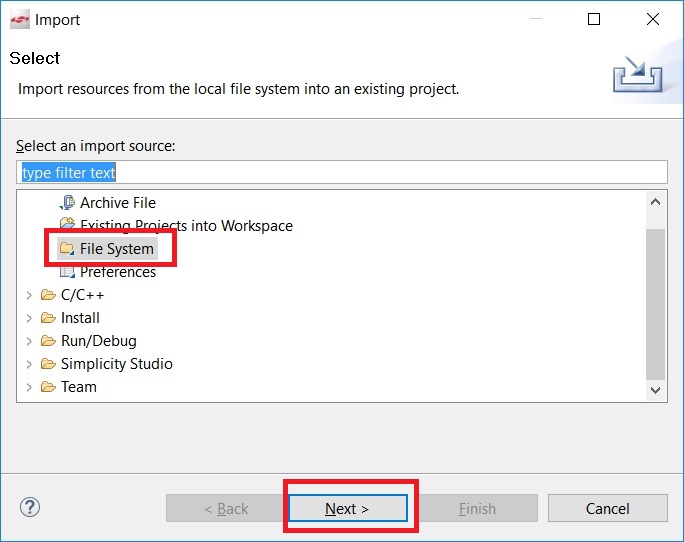
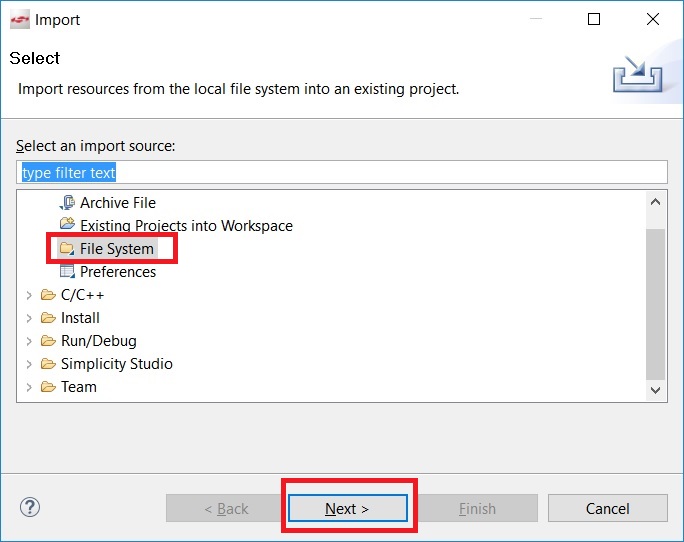
Choose ‘More Import Options…’ and select File System on the next window that pops-up as shown on the images below

Add ‘ex_usbd_vendor_loopback.c’ example as shown on image below, and click Finish.
File location: 'C:\SiliconLabs\SimplicityStudio\v4\developer\sdks\gecko_sdk_suite\v2.5\app\micrium_os_example\usb\device\all'

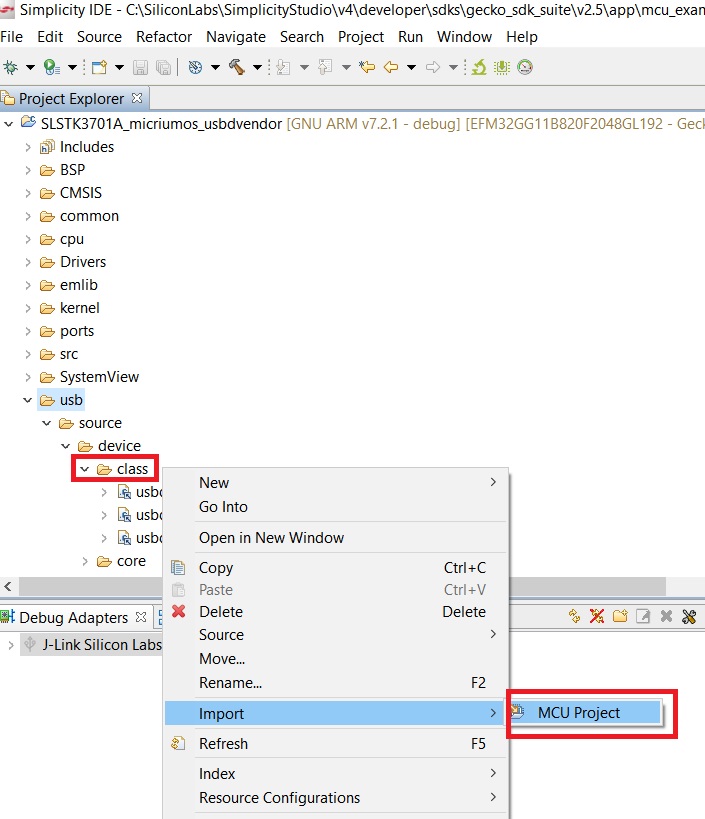
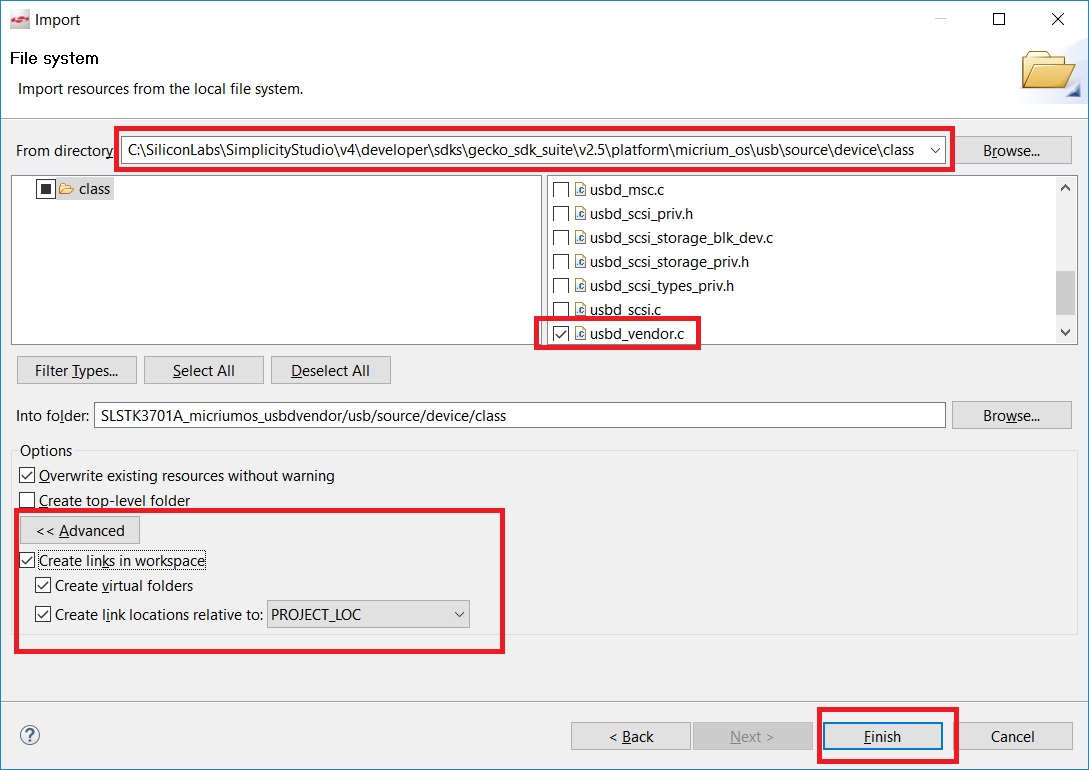
Expand the usb>source>device>class section in the Project Explorer panel and right-click on class. Select Import > MCU Project and add the USBD VENDOR class file as shown on images below
Use the Browse button to locate the VENDOR class files to be added as shown below.
File location: 'C:\SiliconLabs\SimplicityStudio\v4\developer\sdks\gecko_sdk_suite\v2.5\platform\micrium_os\usb\source\device\class'
Running the Example
You can now build your application and flash it on the board. Once the application starts running, you should see LED0 on the board blinking which means all the initialization was done correctly; therefore, we can now test the USBD VENDOR demo.
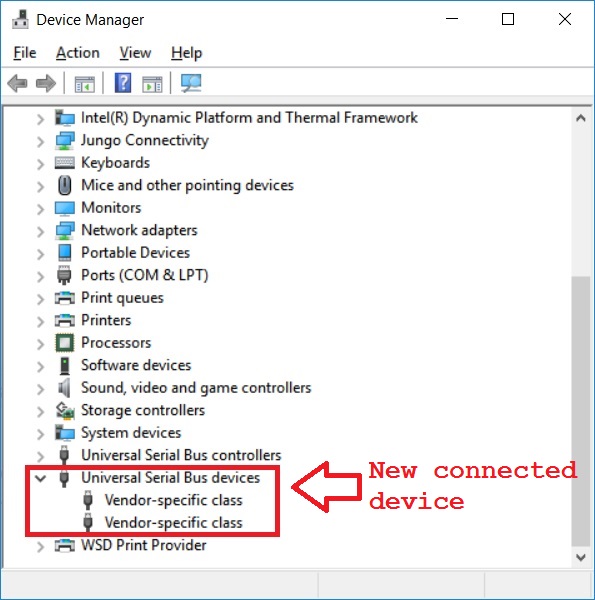
Use a Micro-USB B cable to connect the PC to the EFM32GG11 board. As soon as you connect it, Windows will enumerate the device and display it in 'Universal Serial Bus Devices' as shown in the image below.
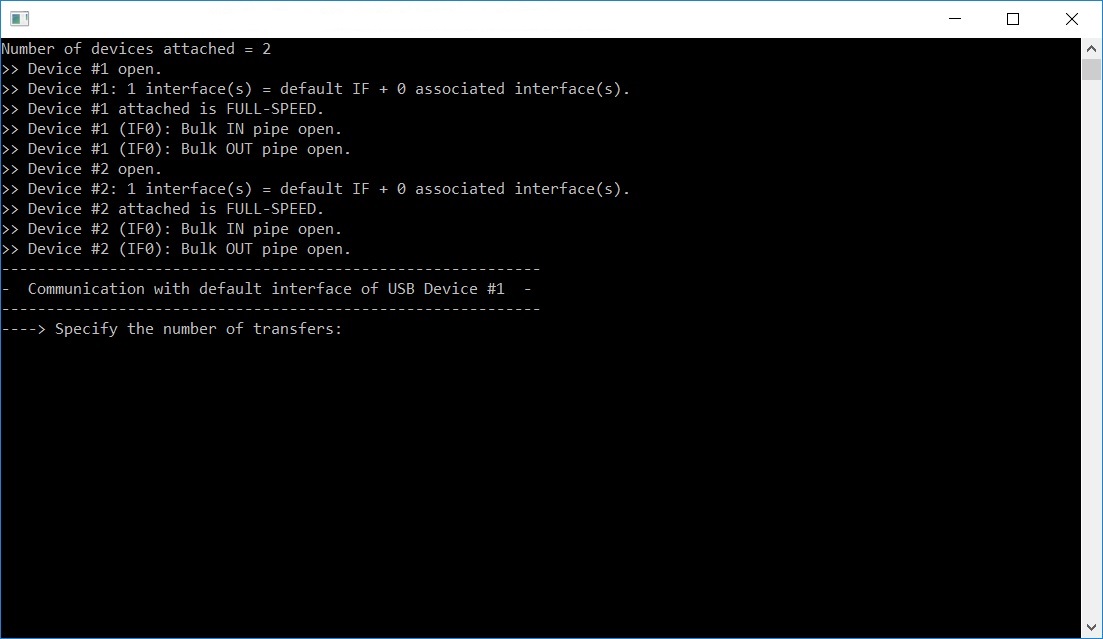
Execute the Windows USB application provided in the attachment (Located at 'App\Host\OS\Windows\Vendor\Visual Studio 2010\exe\x86') and provide the number of transfers.
Source: https://www.silabs.com/community/blog.entry.html/2019/01/04/micrium_os_usb-devic-Mn1d
Looking to integrate Silicon Labs products with your design? Our Applications Engineers offer free design and technical help for your latest designs. Contact us today!
About Symmetry Electronics
Established in 1998, Symmetry Electronics, a Division of Braemac, is a global distributor of electronic components and systems. Combining premier components and comprehensive value-added services with an expert in-house engineering team, Symmetry supports engineers in the design, development, and deployment of a broad range of connected technologies.
Exponential Technology Group Member
Acquired by Berkshire Hathaway company TTI, Inc. in 2017, Symmetry Electronics is a proud Exponential Technology Group (XTG) member. A collection of specialty semiconductor distributors and engineering design firms, XTG stands alongside industry leaders TTI Inc., Mouser Electronics, and Sager Electronics. Together, we provide a united global supply chain solution with the shared mission of simplifying engineering, offering affordable technologies, and assisting engineers in accelerating time to market. For more information about XTG, visit www.xponentialgroup.com.